Start a Session and Unlock Tests/Sessions
You can start a session to make a test or test unit available to students in the session. Then, you can unlock the test or unit to give a student access to it.
The PearsonAccessnext page view can appear differently depending on test type and session status.
Prerequisites
Prior to this step, an authorized user may need to print test tickets and seal codes (if your program requires it).
Step-by-Step
Start a Session and unlock student tests.
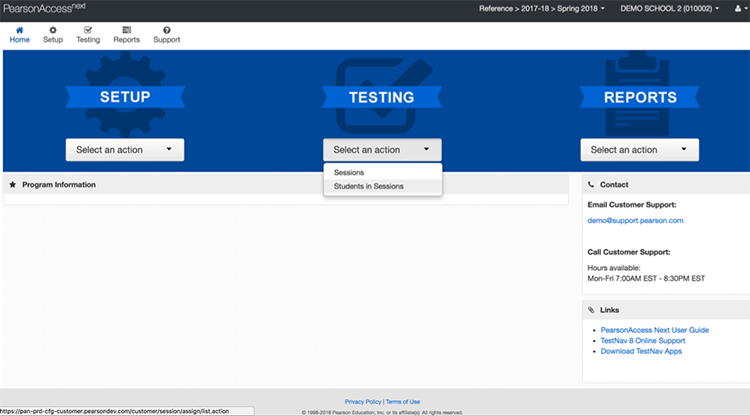
From Testing, select Students in Sessions.
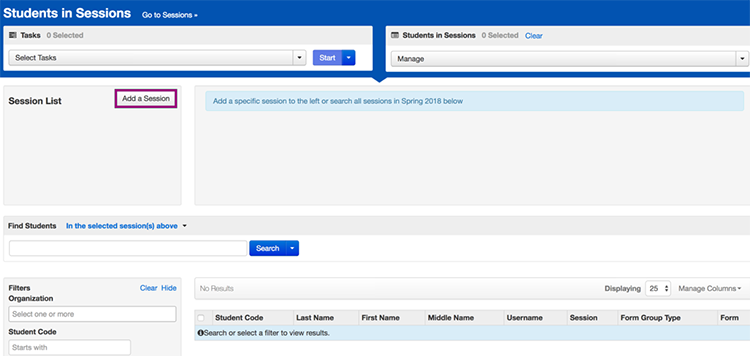
Click Add a Session.
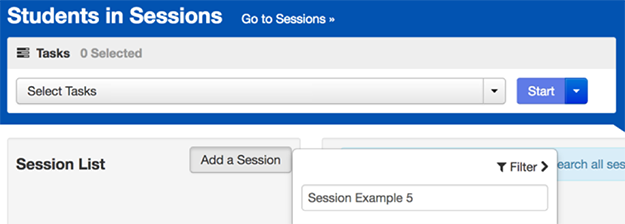
Type a session name into the search field and click Search.
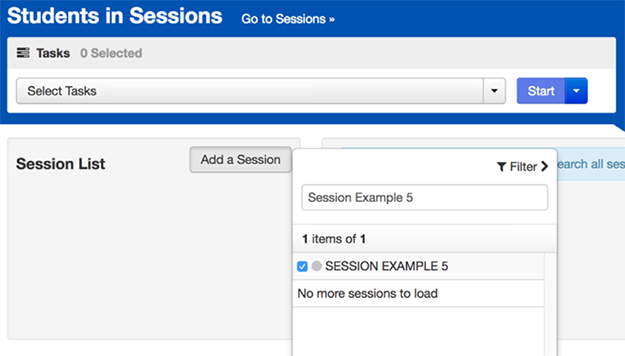
Click the checkbox next to the session and click Add Selected.
Click Start Session. See also below:
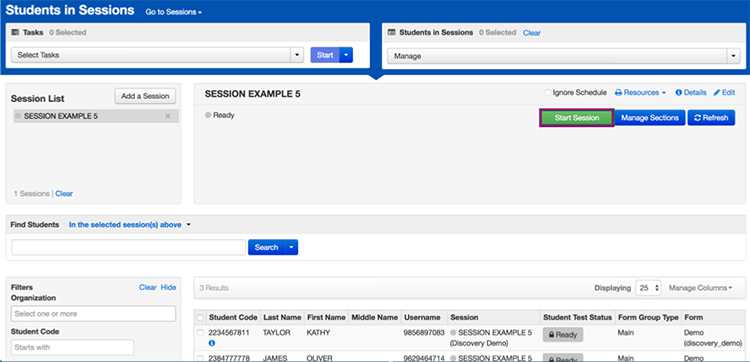
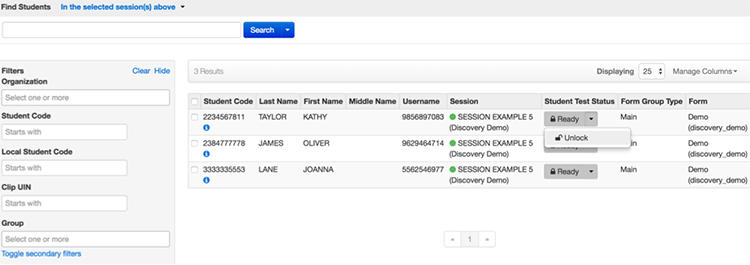
Select the dropdown to unlock a test (unless auto unlock is enabled):
For an individual student
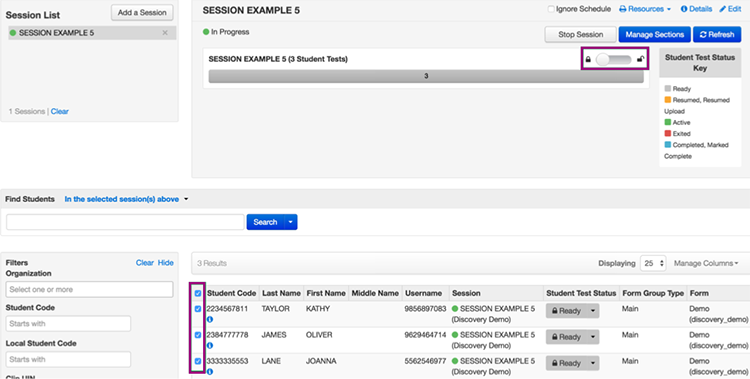
For all students
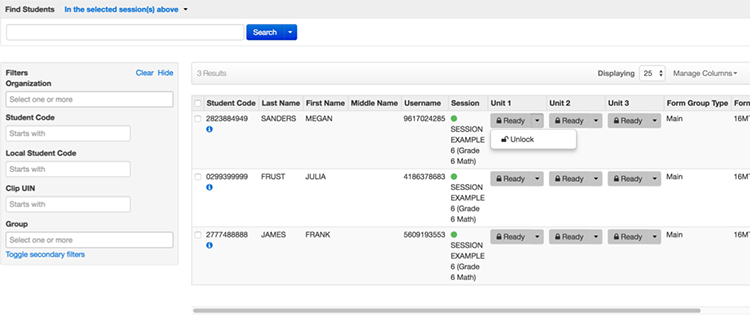
Select the dropdown to unlock a unit of a test:
For an individual student
For all students

Unlock Multiple Sessions
Dependent upon user role and permission, authorized users can unlock multiple sessions with an In Progress or Stopped status:
- From Testing, select Session.
- Type session details into the search field and click Search.
- Click the checkbox next to the sessions.
- Click Start and select Lock / Unlock Multiple Sessions.
- Click Lock or Unlock.
Start a TestNav Remote Session
If sessions are already created with remote testing selected, the proctor can simply start the session.
1. In Testing > Sessions, select the session you will proctor.
2. Select Go to Students in Session.
3. Select Monitor Test before students start signing into TestNav. (This example is a battery test with two parts which is why there are two links.) See below for details.
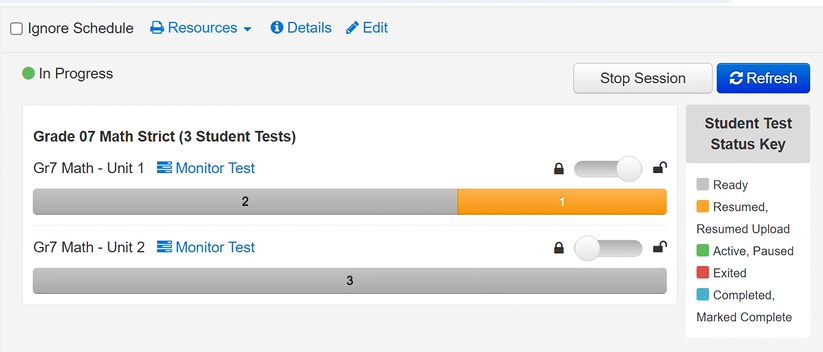
Start a TestNav Remote Session with Mandatory Group Call
Remote Test Proctoring supports placing remote testers into a mandatory holding room, allowing the proctor to give test directions to all testers with a remote test session, prior to testers proceeding into the test.
The students need to have been placed into a remote session designating that a group call before testing is required. When these testers log in to TestNav, they will see a message that a group call is required, but the Continue button will not be active until the proctor starts the group call.

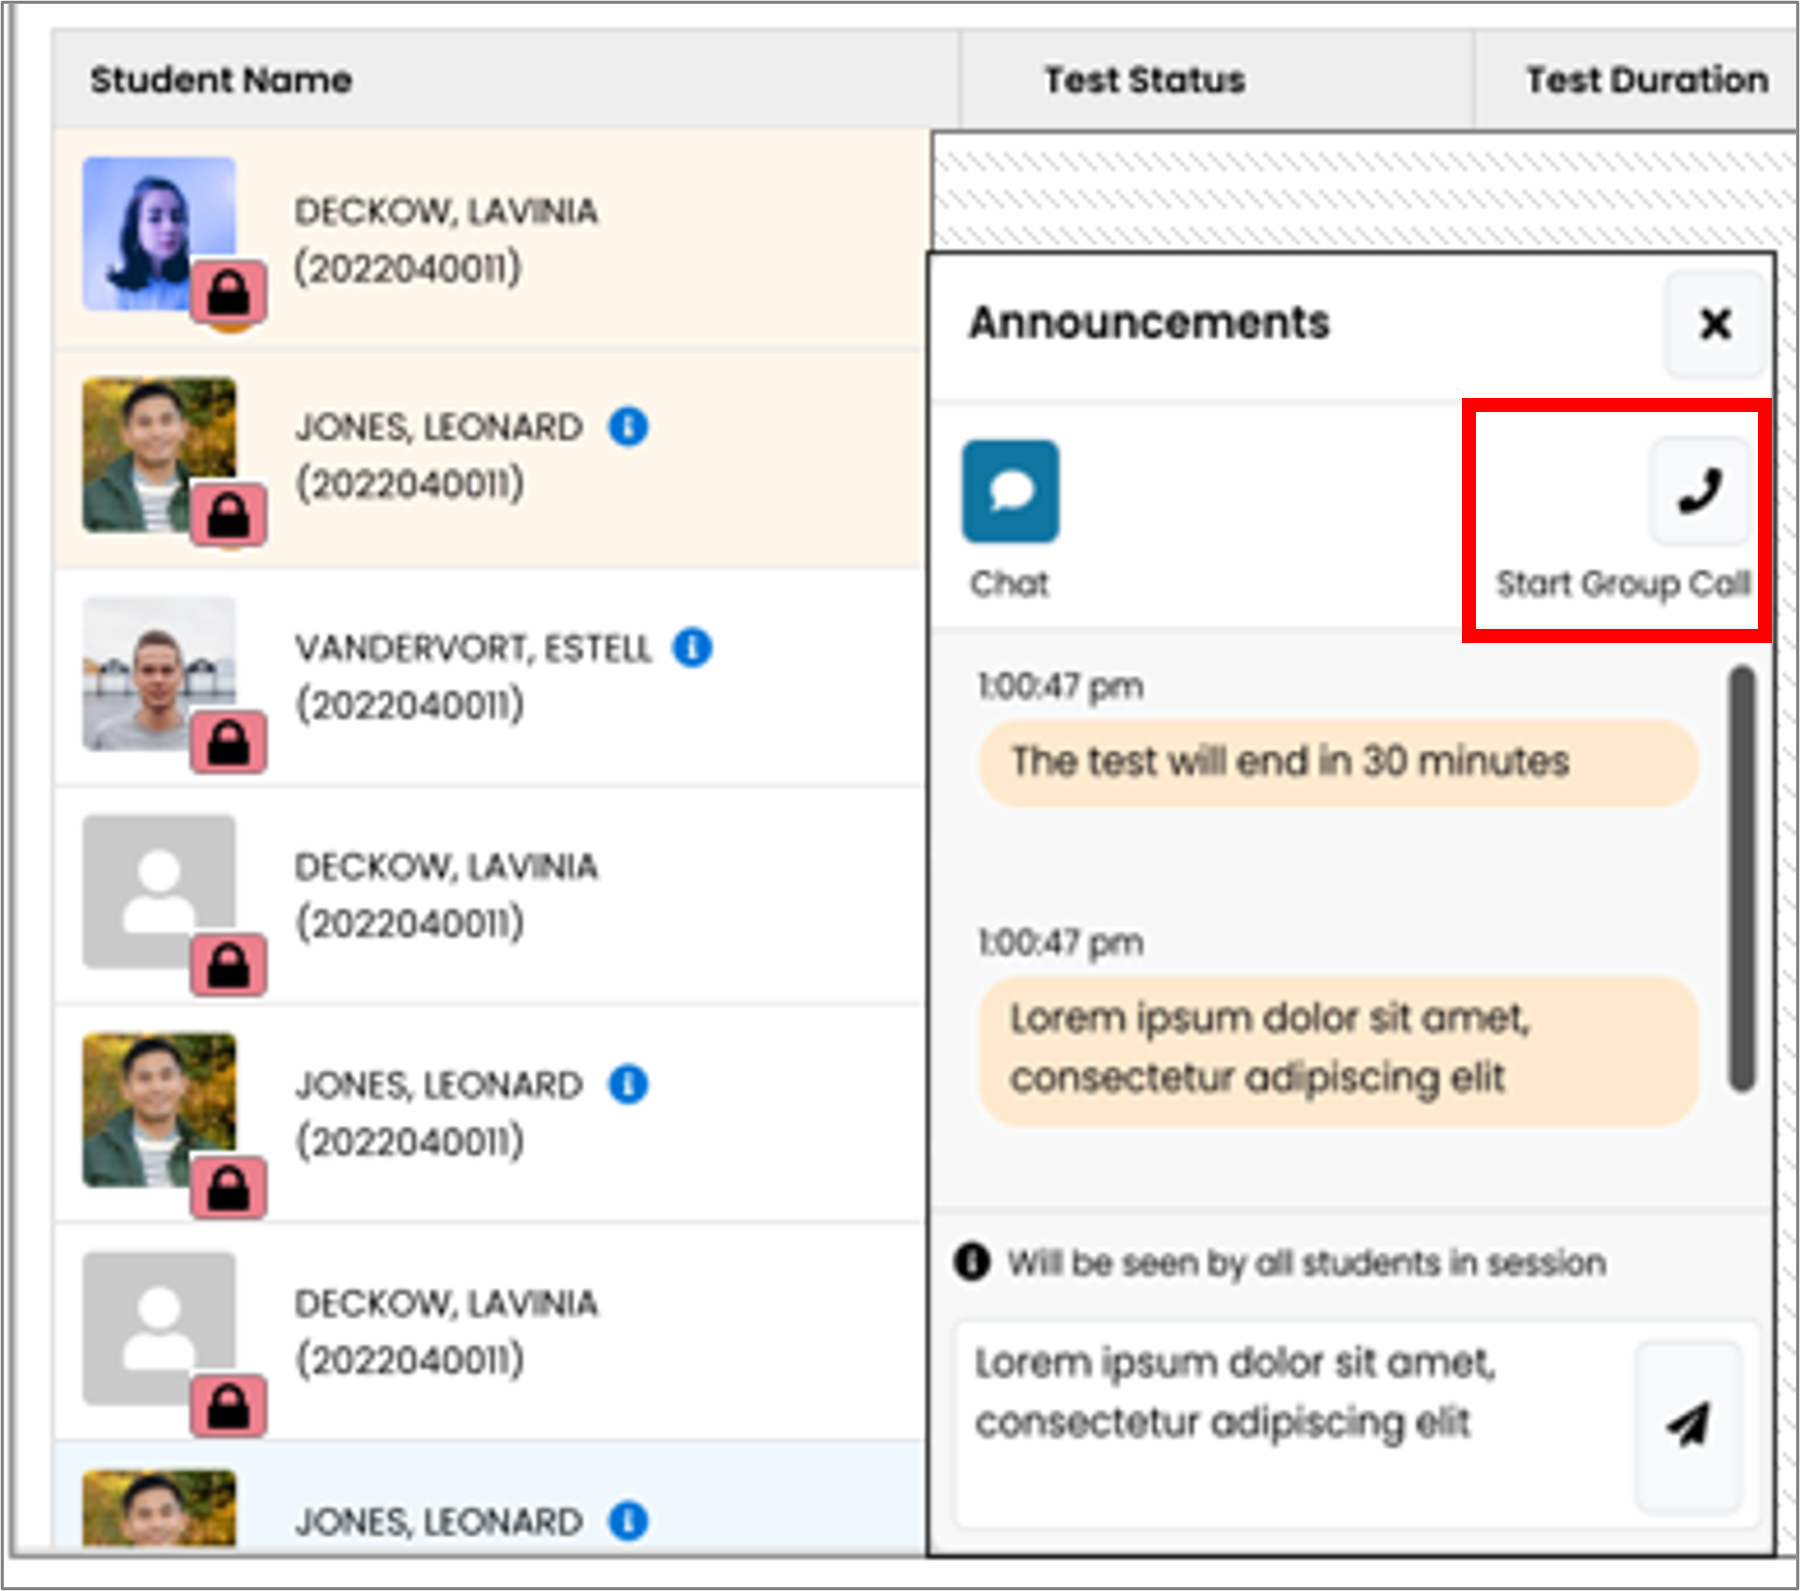
There are additional steps for the proctor before students can enter their test. All testers will show as locked on the test management session screen. The proctor can begin the group call using the Announcement widget Start Group Call button.
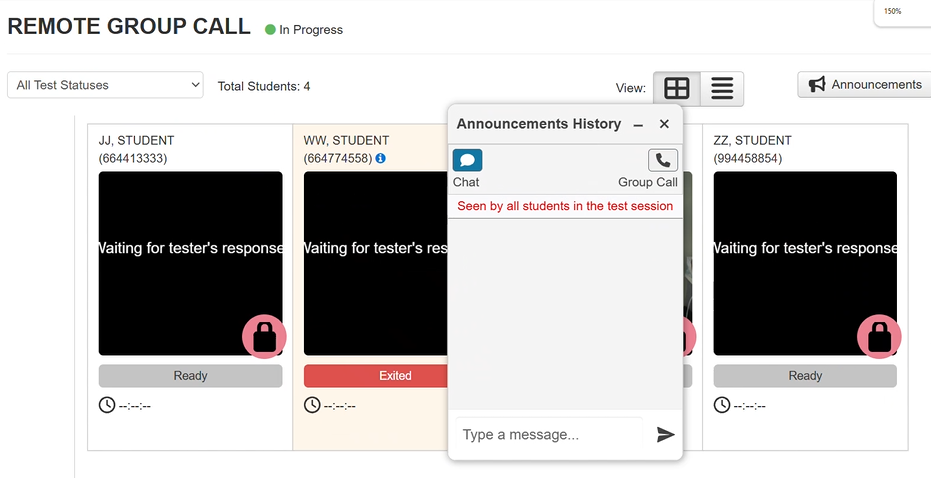
When a tester receives the group call from a proctor, their Help Tool widget opens, and they are brought into the group call. The tester is muted. They can raise their hand if they need to communicate directly with the proctor. The proctor can individually unmute testers for discussion.

When the group call is completed, the proctor should press End Call in the Announcement widget.

Proctors are given the choice to allow all testers to proceed to the test or not to proceed.

If Do Not Proceed to Test is selected, the proctor must individually unlock each tester when they decide it is appropriate to do so.
Once the proctor ends the group call or individually unlocks a specific tester, the tester’s Continue button becomes enabled. When the tester presses the Continue button, they will proceed into the test.

What's Next?
For students with specific accommodations that require you to enter a student's responses...
From Testing, select Students in Sessions.
From the Session List, select a session with In Progress status.
Under the student list Answer Input column, click Launch Test. You cannot launch a test for students with a Complete or Marked Complete status.
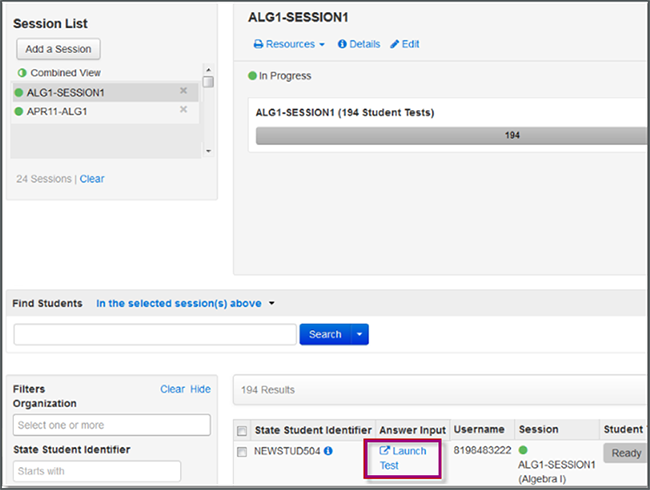
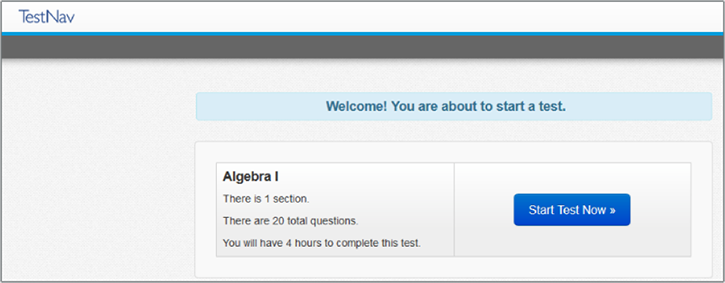
You can, then, sign in to TestNav, and click Start Test Now.
(Optional) When a test session is In Progress and students are testing, you may want to lock some student tests/units of a test. You can lock the test/unit for all students or for an individual student.