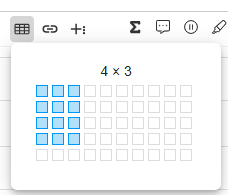
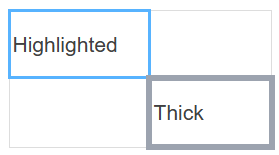
ADAM Support Authoring Special Features Available Across Item Types Current: Working with Tables Working with Tables Items support the use of tables. When using tables, be mindful of the width to avoid the need for left-right scrolling on test devices.See also: Author Test Items, Formatting ToolbarInsert a TableIn edit mode for an item, place your cursor where you want the table to go.Select the Table icon.Drag across the grid to set up the desired number of rows and columns. Select inside a cell to enter contentWhen you select inside a cell, a pop-up palette displays optional cell and table formatting options. See below for details.Table and Cell Formatting OptionsTable Header: As a best practice for accessibility, use this option to denote a table header rather than relying on font. Remove TableRow: Insert or delete row.Column: Insert or delete column. Table StyleTable PropertiesCellCell Background Vertical AlignHorizontal AlignCell StyleTiny Link: https://support.assessment.pearson.com/x/bAA4Cw ×