Edit and View Users
Typically, the only changes made in rostering is to preferred student name, student accommodations and test assignments, if used. Some customers may create or edit some users within ADAM.
- Go to Rostering > Users.
- From here, you can:
- Click Create New to add a new user. You can only create users in your organization and child organizations, depending on your role authority.
- Click the Edit icon for a user to make changes.
Complete or update each of the relevant tabs.
Click Save after making changes.
- First Name and Last Name: Required.
- Role: Required. Select a user role, such as Teacher or Student.
- Identifier: Required. The user ID from the state, district, or school.
- Grades: Required for users in Student and Teacher roles. Select the user's grade(s).
- Schools (Org Scope): Required. Select the user's districts or schools. This and other menus typically default to 25 entries; start typing in an org name to filter the list and select your org.
- Reporting Orgs: Select additional reporting organizations; for example, if a student is enrolled in a charter school but also reports to a district for funding. Organizations selected in the Schools dropdown cannot be selected here because they already have reporting enabled by default.
- Assignment Tags: Select student assignment tags, such as ALG1, which can be used as criteria when creating a test administration. This makes it easier to create administrations with out-of-level testing. See also: Test Assignment Tags.
- Sourced ID: Required. Enter the user's ADAM identifier.
- Username: Required for non-student users and students who sign in to ADAM. Enter a username. Not needed for users who do not need to sign in to ADAM.
- User Email: Optional. Users with listed email addresses can receive welcome and password reset emails.
- Set Password: Enter and confirm a password OR leave blank if you have entered the user's email. The user sets their password from the welcome email.
- User Enabled: Required for active users. You must select this checkbox for users to sign in to ADAM. Note that you can also enable or disable multiple users from the User Config search page.
For more information, see Preferred Names in ADAM.
- Preferred First Name: Optional. If preferred names are entered, they display in ADAM rather than the given names.
- Preferred Last Name: Optional.
The Demographics tab appears only for student records (for users with the appropriate permissions). Only the demographics used in your system will appear.
The Accommodations page appears only for student records (for users with the appropriate permissions). Accommodation options that appear (and their names) depend on your system's client settings. Some customers set up accommodation profiles per subject, enabling a student to receive text to speech for math and science but not ELA, for example.
The Parent/Guardians tab shows the student's parent/guardian information (first name, last name, and email), if provided in the roster file. Click Unlink to remove a guardian.
This tab appears only for student records (for users with the appropriate permissions).
The Classes tab shows a list of the classes relevant to student or teacher. Typically, edits to this data is not made in ADAM.
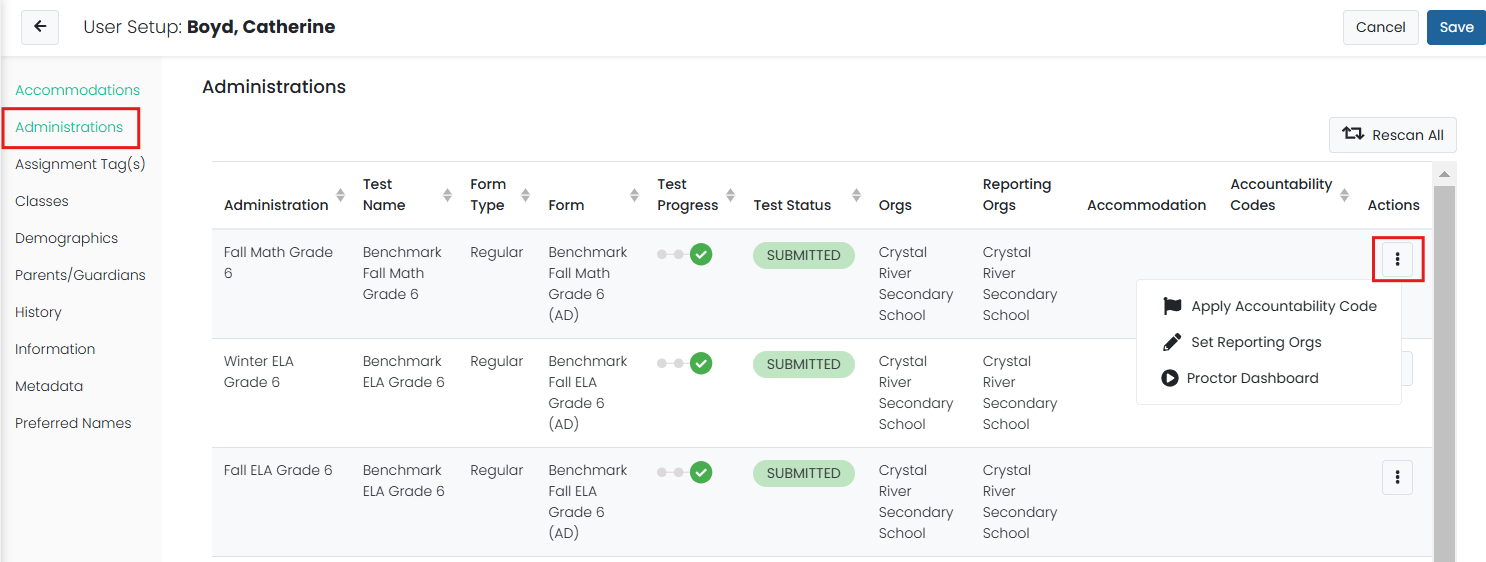
The Administrations tab shows a list of historic and active administrations the student took. This tab appears only for users with the appropriate role permissions. Available option in the Actions menu will vary.

The History tab shows an audit history of who made an update and when to the user record. Click a change entry to see a 'Before and After' view of the changes for that entry. This includes changes to a student's record completed with an accommodation upload. This additional logging will aid in investigating student changes made when district / school users upload accommodations to ADAM.
Users with the appropriate role permissions can view and edit user metadata fields. The data for these fields is typically provided by LaunchPad or manually uploaded from User Config.
These fields are custom fields (not standard ADAM fields) that are defined in Client Settings.