Manually Create a Proctor Group
Proctor groups are generated automatically for administrations, but you also can manually create proctor groups that can be assigned to a school in or out of your org scope.
NOTE: A class may have students being administered assessments in multiple proctor groups, but the student results will still be associated with their class. Administrations with a manually created proctor group will have a unique test code and proctor password.
You may want to manually create a proctor group when:
- A class is divided into multiple proctor groups, each taking the assessment in several different locations within the school, or offsite.
- Students with the "Extra Time" accommodation are taking the assessment in a separate room.
- Students taking a make-up session from different classrooms are being proctored together at a later date.
Create a Proctor Group:
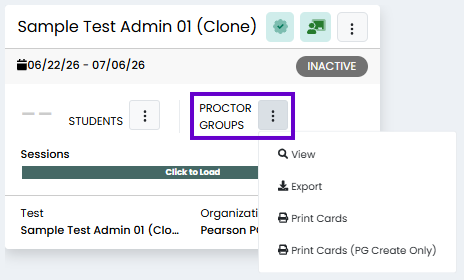
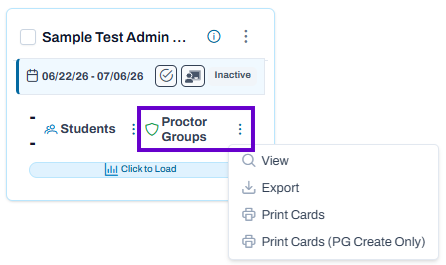
- Go to Test Management > Administrations.
- In the appropriate admin card, select View in the Proctor Groups menu.
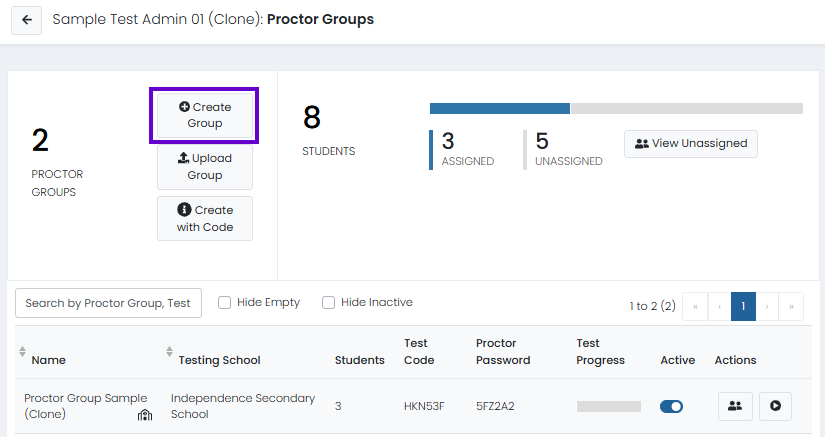
- Select Create Group.
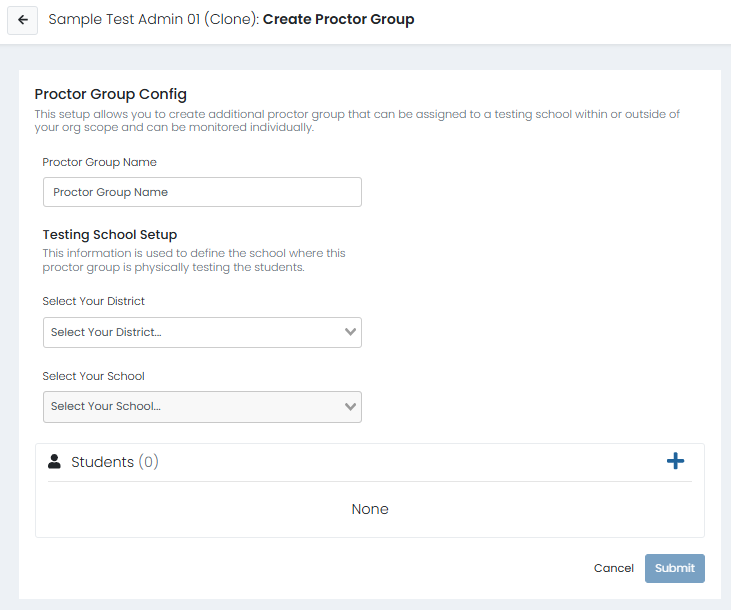
Classic User Interface:
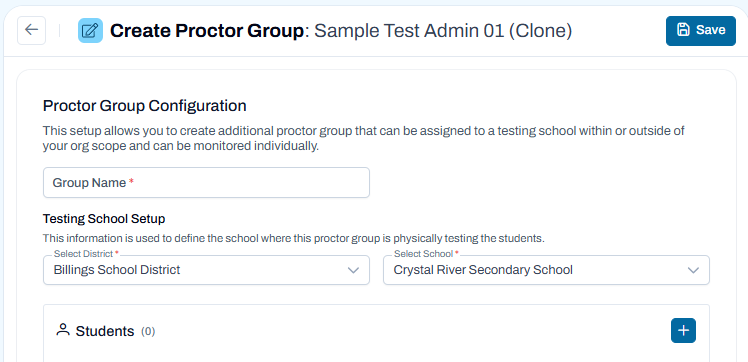
Updated User Interface:
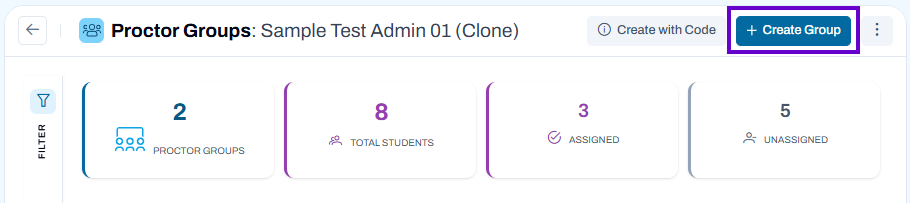
- On the Proctor Group Configuration page, enter the Group Name and select a district and school.
- Optionally, select the plus symbol to add students (see instructions below).
- TestNav Only: If available for your program, optionally select the Remote Proctoring checkbox to proctor the test remotely, such as at a different school. On the Proctor Groups page, a camera icon indicates are remote proctor group. The proctor can view students if they enable their camera, and students can select the Raise Hand icon to get help via chat.
- Select Submit to save the proctor group.
Classic User Interface:
Updated User Interface:
The proctor group you created will now appear with the original list of proctor groups. The proctor group will have a unique test code and proctor password.
Adding Students to a Proctor Group
Filter the Student List
- Use the Grades, Accommodations, Schools, and Class filters to narrow the list of available students.
- Select Refresh to reload the student list after changing filters.
- Use the Search by student name field to find a specific student.
Select Students
- Review the list of available students.
- Verify student details such as name, identifier, school, and testing status.
- Click the Add (+) icon in the Actions column to add an individual student to the proctor group.
Add Multiple Students
- Use the Group Assignment filter to display the desired students.
- Add students individually using the Add (+) icon, or use the available selection options for your administration.
- The Add Students button displays the number of students currently selected for addition.
Navigate the List
- Use the page navigation controls to move between pages of results.
- Change the page size using the records-per-page dropdown.
- Select More Columns to view additional student information.
Save Your Changes
- After selecting the appropriate students, click Add Students to assign them to the proctor group.
- Click Close to exit without adding additional students.
Classic User Interface:

Updated User Interface:

- Create an Administration for more information on how proctor groups are managed in eligibility-based and class-based administrations.
- As an alternative, you can upload a spreadsheet with group names and students; see Upload Proctor Groups for details.