You can use the Upload Proctor Group option to quickly manage the proctor groups. You can create proctor groups with or without students. Once uploaded, you can manually add and remove students as needed. See also: Edit Proctor Group Membership.
Access Upload Proctor Groups Area
- Navigate to Test Management > Administrations.
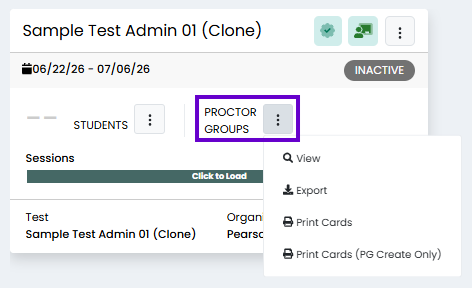
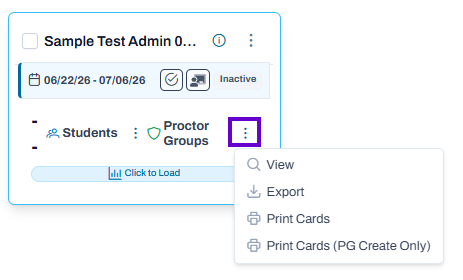
- Locate the administration and then select the View under Proctor Groups.
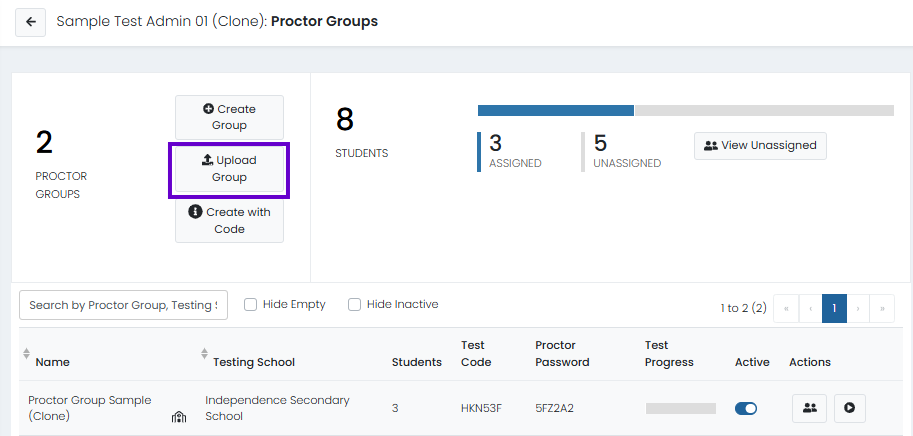
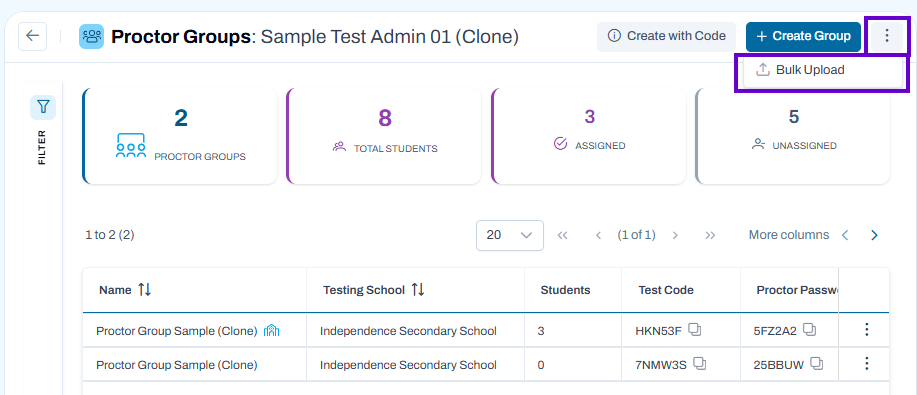
- Click the three dots next to "Create Group" to select Bulk Upload.
Classic User Interface:
Updated User Interface:
Upload Group
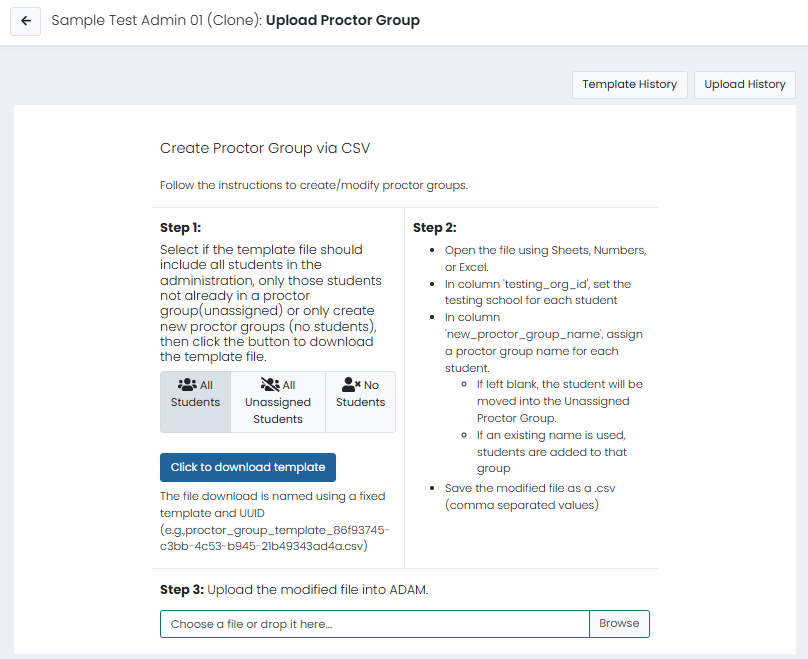
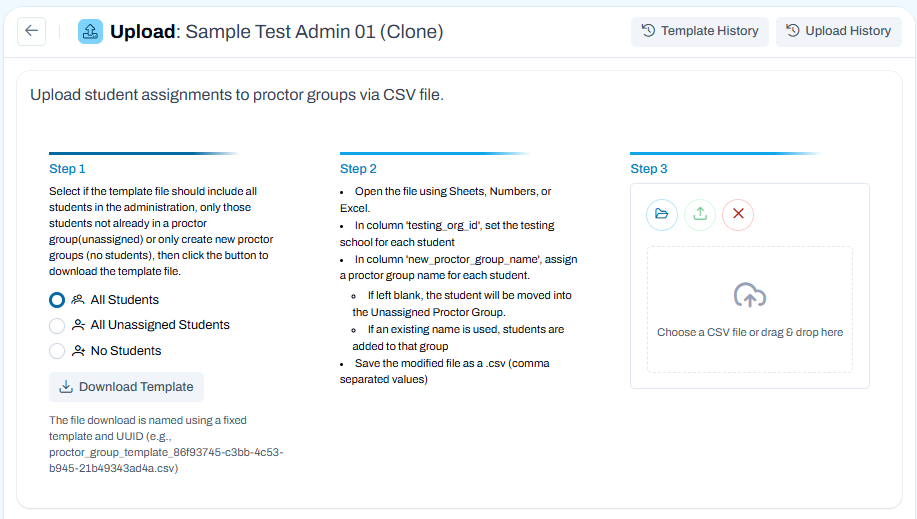
Use this page to create or update proctor groups by uploading a CSV file that assigns students to testing groups.
Classic User Interface:
Updated User Interface:
Download the Template
- Select which students to include:
- All Students – Downloads all students in the administration.
- All Unassigned Students – Downloads only students who are not currently assigned to a proctor group.
- No Students – Downloads a blank template for creating new proctor groups.
- Click Download Template to save the CSV file to your device.
Update the CSV File
- Open the downloaded CSV file in Excel or another spreadsheet editor.
- Enter the testing school for each student in the testing_org_id column.
- Enter a proctor group name in the new_proctor_group_name column for each student.
- Leave the field blank to keep a student in the Unassigned proctor group.
- Use an existing proctor group name to add students to that group.
- Use a new name to create a new proctor group.
- Save the completed file in CSV (.csv) format.
Upload the File
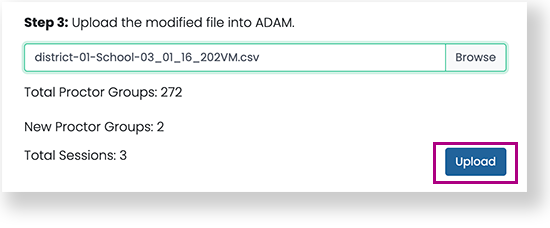
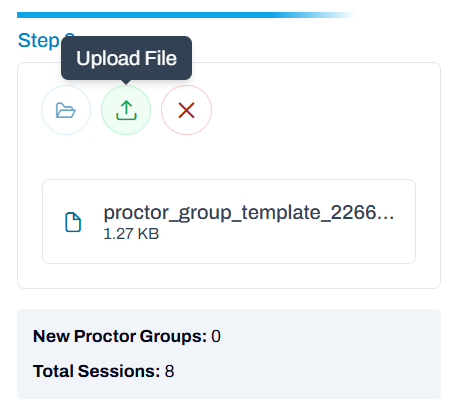
- Click the upload area or drag and drop the completed CSV file into the page.
- Review any validation messages and correct issues if needed.
- Complete the upload to create or update the proctor groups.
Classic User Interface:
Updated User Interface:
The proctor group(s) appear in the administration proctor group list.
Tiny Link: https://support.assessment.pearson.com/x/loNHBg