Author a New Form
Forms are containers that hold Items and define how those items should be displayed in the player. Forms are used to construct tests. Create the items you will need before creating a form.
See also: Create Instructions for a Form, Reporting Categories and Derived Scoring, Form Review and History
Create a New Form
- Go to [AD] Authoring > Forms.
- Select the appropriate Bank in the dropdown. The bank must contain items to create a form.
- Select Create New.
Builder
Use the Builder tab to organize the items for this form. Here, you can create multiple sections and load items into a section.
To create a fixed form:
- Enter the form information:
- Form Name
- Form Identifier: Automatically generated.
- Form Type: Fixed or Adaptive type. Only computer-adaptive testing (CAT) compatible items can be added to Adaptive forms; most banks do not have these item types.
- Form Status: Available statuses, and who can use each, are defined during Bank Setup as part of the site implementation setup. Choose the appropriate Form Status from the list. The status is for informational and filtering purposes only and has no impact on the functional ability to use the form in a test.
- Select Add Fixed Section.
- Enter the Section Name. The Section Identifier is automatically generated. If the form only has one section, you can simply repeat the form name or call it Section 1 of 1, etc.
- Select Settings and enable options as needed for this section:
- Calculators: Select one or more calculators. See also: Calculators
- Rulers: Select one or more rulers.
- Protractor: Select to include.
- Show Instructions Screen: Select the checkbox to show students instructions for the section. Select Add Screen to choose an existing Resource instructions page. You can edit this form later to add a Resource page if you haven't already created it. See also: Create Instructions for a Form.
- Use Timer: Select the checkbox to use a timer. Enter the Time Limit (in seconds), the Warning Time (in seconds), and the Time Limit Type. The warning time is the time remaining when the warning is displayed to the student. A soft warning does not force the student out of the section when the timer expires. A hard warning forces the student out of the section when the timer expires.

- Exhibits: Upload a document with additional content in a pop-up window for all items in this section. These will be available from an Exhibits button in the testing platform. Multiple exhibits can be added. The content must first be made available as a Resource before it can be referenced here. See also: Shared Passages and Other Stimulus.
- Section Labels: If desired, override the default navigation labels.
- Select Save Settings.
- Select Add Items to add test items to the form. Each section must contain at least one item.
- Search for and select the checkbox for the items to add to the form.
- Select Add Items to add the items into the section.
- Select the bank that contains the item(s) you want. You can add items from multiple banks, if needed.
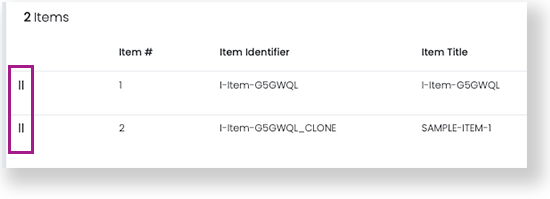
- Use the dragger bars to rearrange the items as needed.

- Select Add Fixed Section to add additional sections as needed.
- Select Save.
Settings
It is critical to review the Settings tab, which controls what tools and accessibility features are available to all students, regardless of their accommodation settings. See Form Settings for details.
Additional Form Tabs
- Scoring: See Reporting Categories and Derived Scoring for details.
- Metadata: During the Bank setup, extra fields needed for forms may be defined. If so, the values for this form are set on the Metadata section. In this example, a single metadata field is set up to collect the Operational Period.
- Description: You can add an internal description to describe the purpose of the form or add other details that will make it easier to keep track when you are authoring many forms or collaborating with other authors.
- Review and History: See also: Form Review and History.